Disclaimer: I want to make it clear that I don't think you should use YouTube as a storage medium for many reasons, but mostly because even though you are essentially just uploading videos, which is what YouTube is meant for, something feels wrong about taking advantage of a platform's storage. With that said, I still think the concept is really cool, which is why I built the project. Hopefully, someone learns something from it.
How the idea came about
A while back, I was scrolling Reddit and I came across this post by turtleship_2006.
Basically, what turtleship_2006 wants is a program that can be used to store any file as a video. Later on, they talk about using these videos to upload to YouTube as a way to send these files to someone. However, where this gets interesting is when you realize that YouTube has no limit to how many videos you can upload; which essentially means that if you're able to make this program you can take these videos you make, upload them to YouTube, and essentially have a 100% free cloud storage solution!
So I built it - I give you 🔗 Fvid. I honestly haven't had the time to update it since I released it, and it needs a lot more work, but the concept works!
How Fvid works
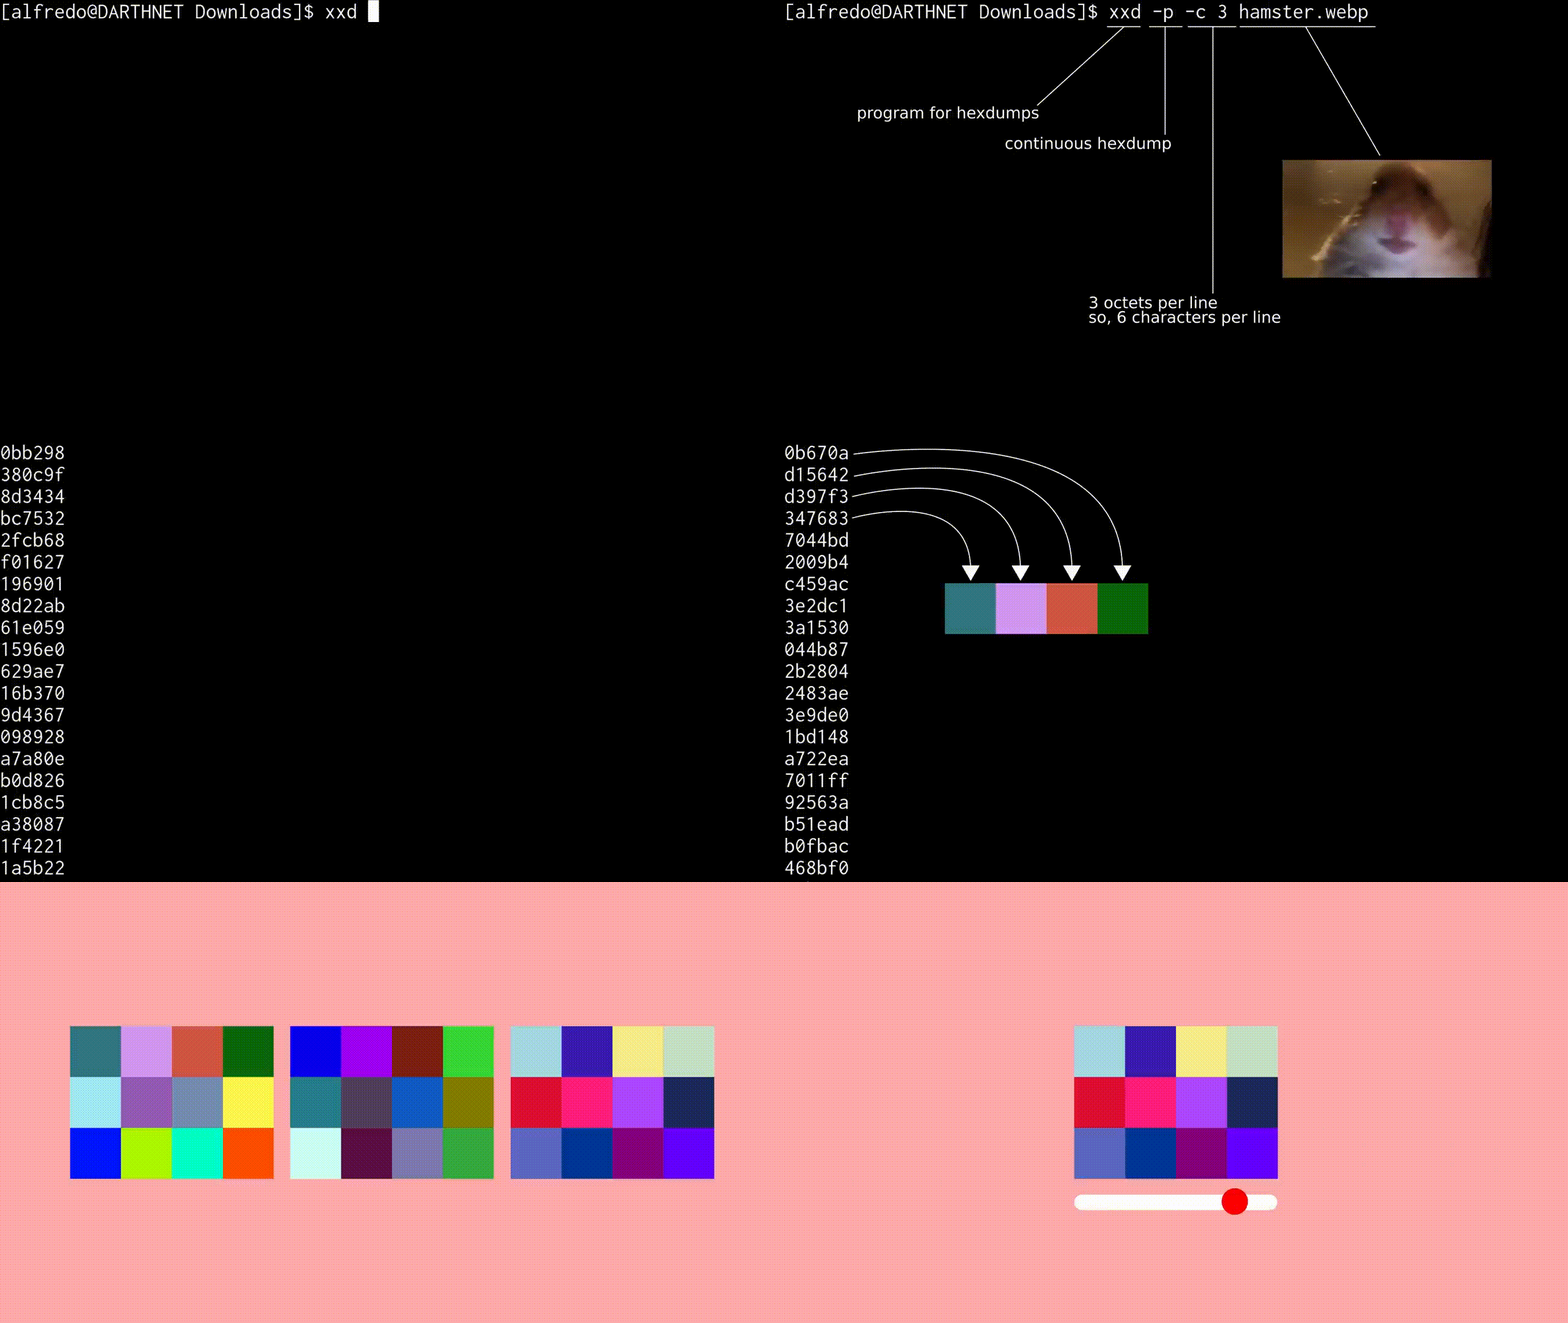
To show you how Fvid works, first, you need to understand how images work. You might already know this, but images are composed of very very small tiny little squares that contain color information. These tiny little squares are called pixels. Pixels carry color data and color data is usually represented in one of two ways. One is using RGB colors. This is just a way of telling you how much red green and/or blue there is in each pixel. Another way of representing this color data is using what's called HTML notation, which is probably more commonly known as hexadecimal values.
Ok, but how does this help us? Well if we use a program like xxd which can show us the hexadecimal representation of a file, we can see that we can use the hexadecimal representation of a file as the colors for pixels. Then taking that further, we can do the same thing over and over again for the rest of the file giving us what is essentially a bunch of images that we can then use to turn into a video.

The problem with decoding data from YouTube videos
Awesome so that's it we have an algorithm! Not quite, you see when you upload the video to YouYube, YouTube compresses that video. This means that the video might look the same, but the colors are different. This is a problem because if we were to go with this approach, that means that the data we get back from the video might not be the same.
The solution to getting around the decoding problem
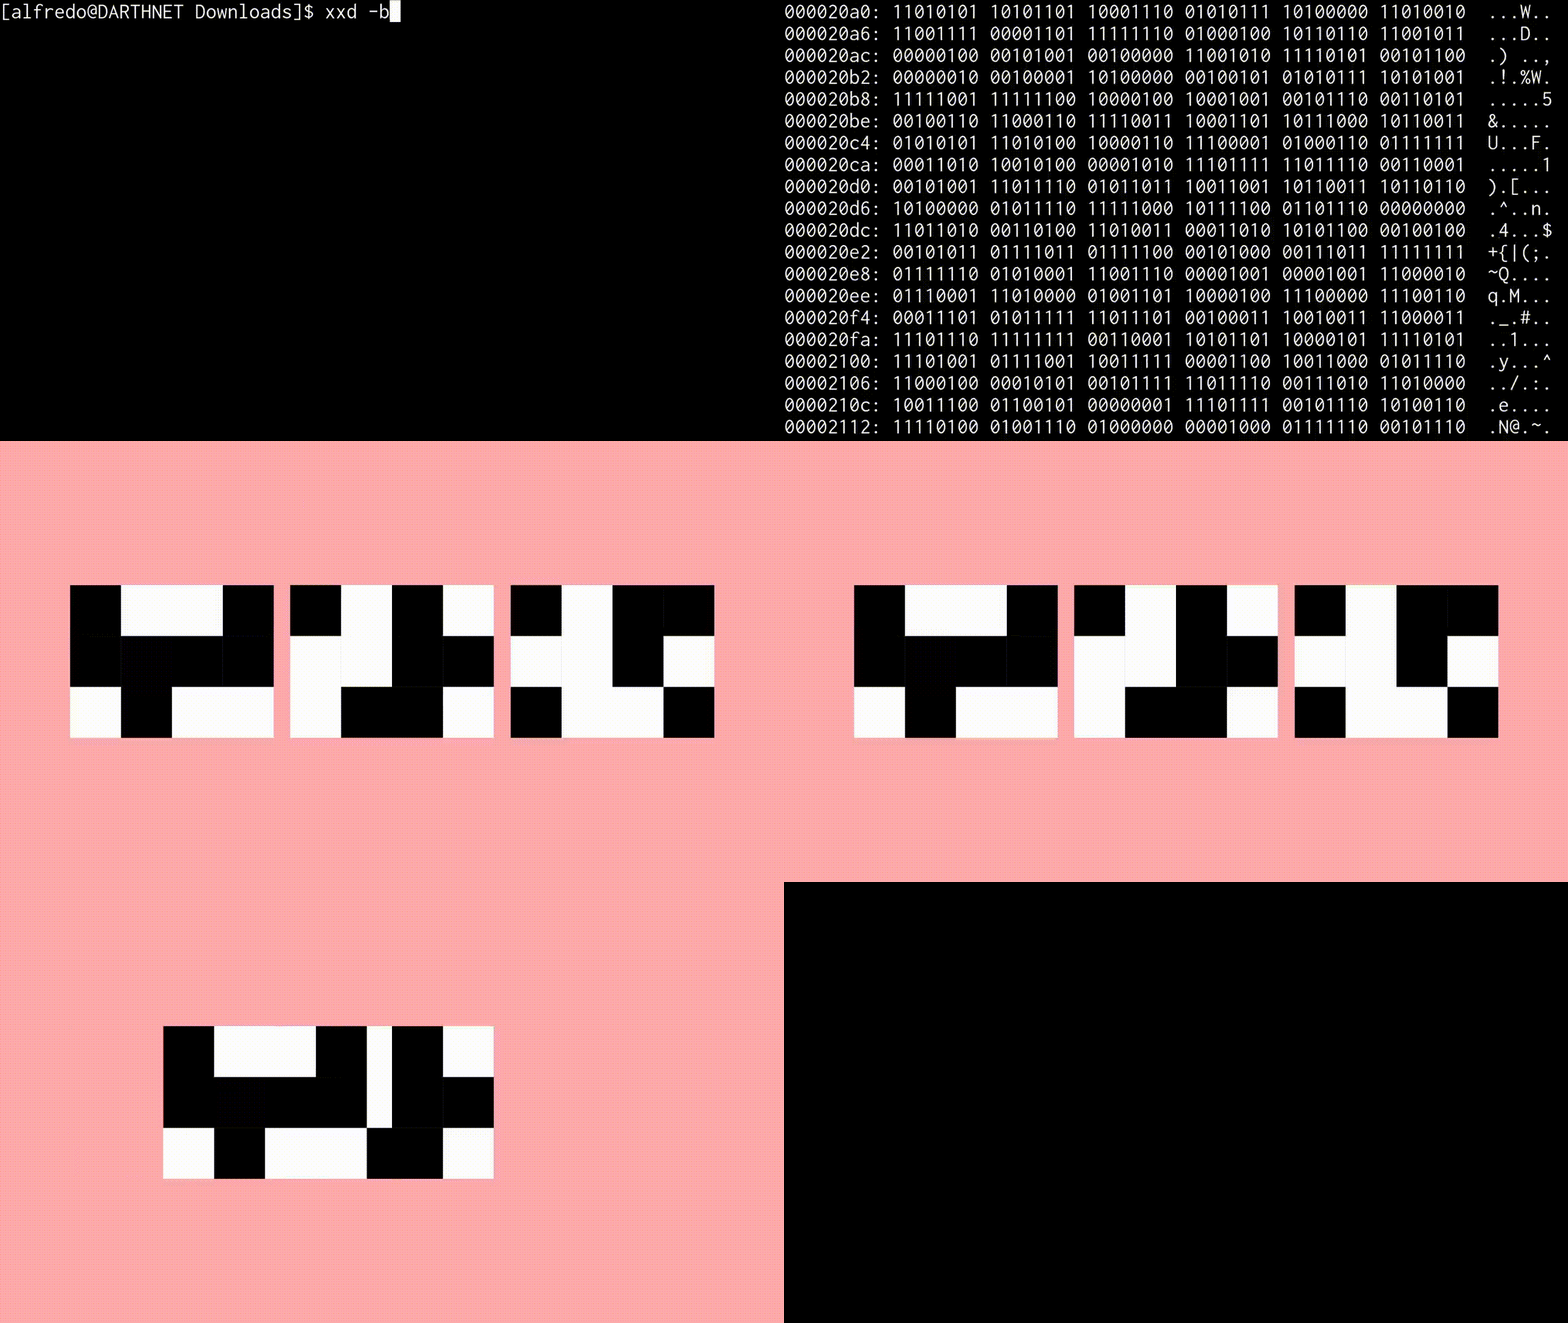
But if instead we use a binary representation of a file and treat black as 0 and white as 1. We can repeat the same process for the entire file thus giving us a series of pictures like before, but instead in black and white. Then we can use those images to make it into a video like before!

Wait a second but didn't you say that uploading a video to youtube changes its color values? So then, how does that help us?
Well yes, it does, but this new approach makes it a lot easier to distinguish between black and white pixels; even if the values are different. Whereas it would be a lot more difficult to distinguish between two shades of green that look very similar. Ultimately, this means that we're able to retrieve our data back with just 1s and 0s instead of having to do a bunch of math to figure out what shade of green youtube changes the color to.
Fvid
Alright, that's enough explanation, let me show you how Fvid works! First, we have a picture of this cute hamster. Let's call Fvid using this picture and tell it to encode the video.
fvid -i path/to/file -e
Where -i is used to specify the input file and -e is used to tell Fvid to encode the file to a video.
This is the result of that encoding:
I know it doesn't look very amazing or anything but that's actually the image included within the video.
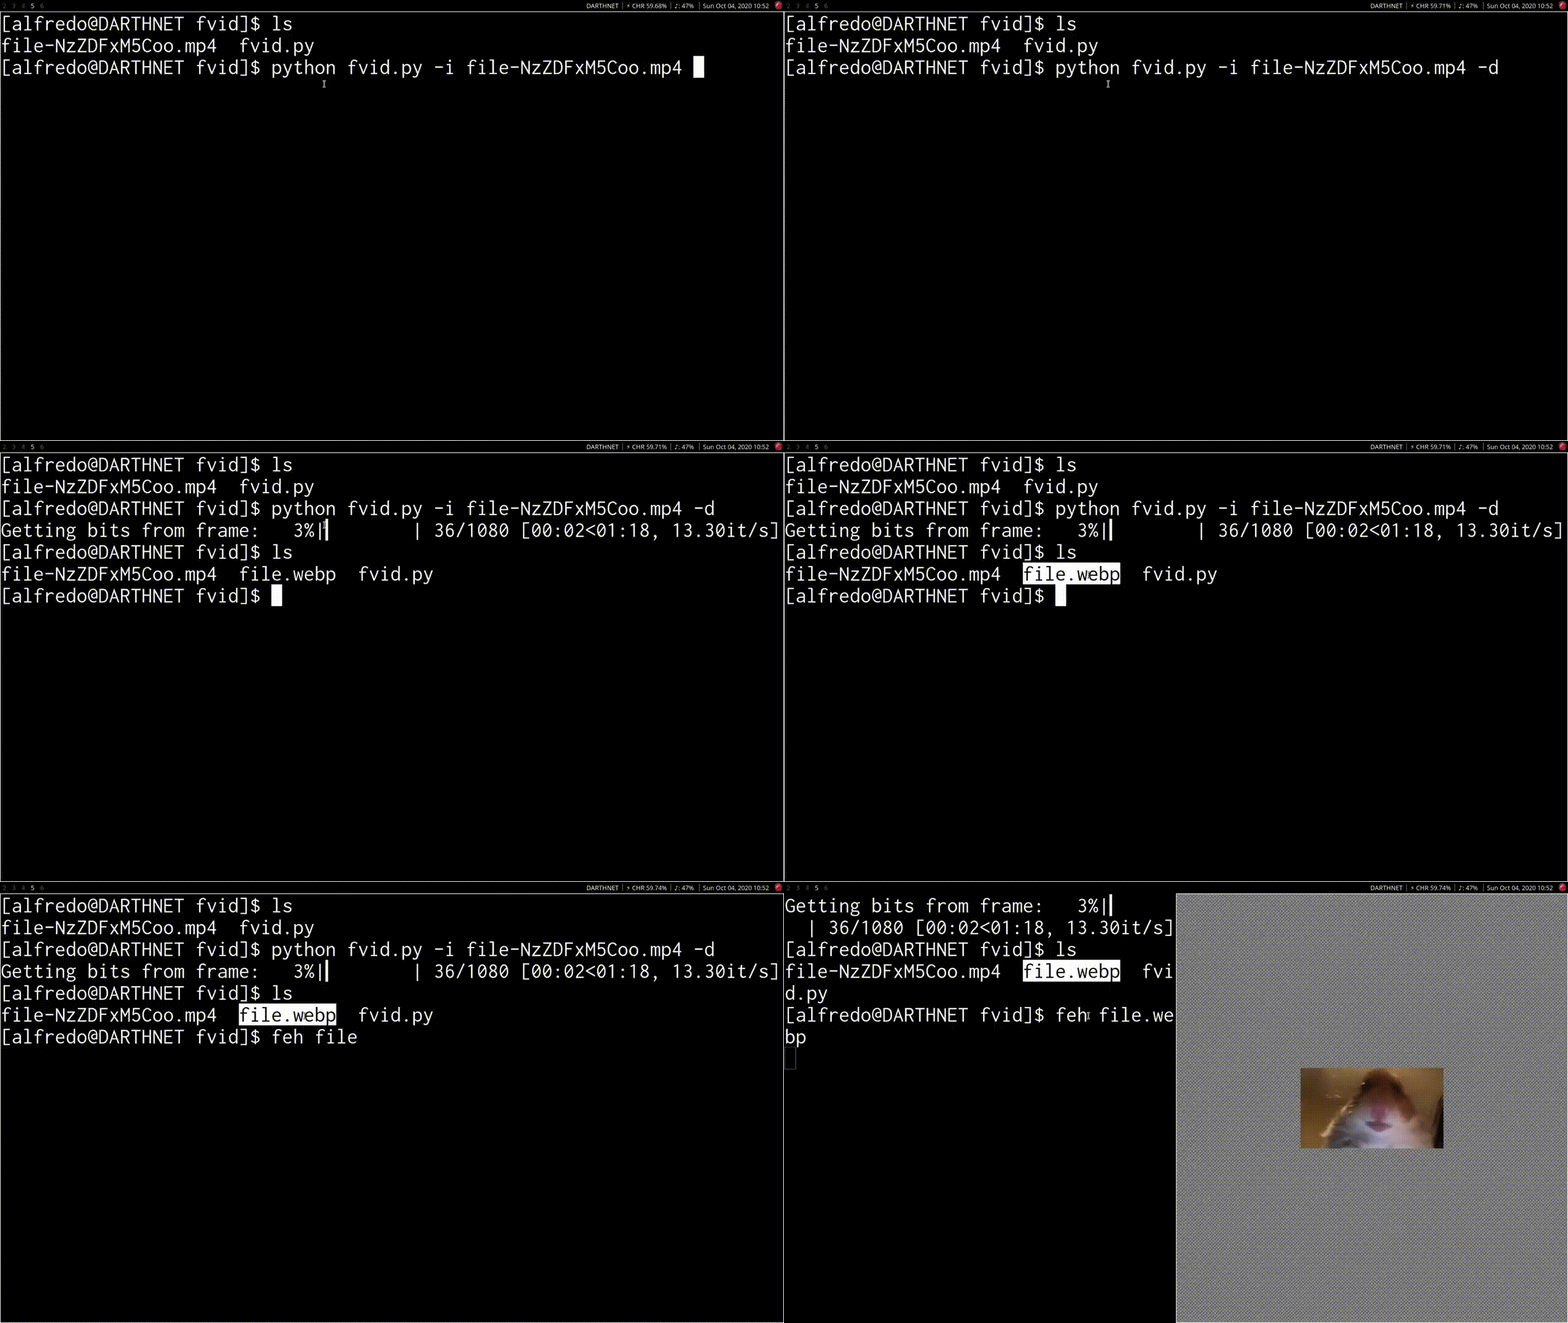
Now let's download that YouTube video using youtube-dl and use Fvid again to decode it. This time we have a new image here and as you can see, the image has the right extension as the original.
fvid -i path/to/downloaded/youtube/video -d
Where -i is used to specify the input file and -d is used to tell Fvid to decode the video to get the file back.
